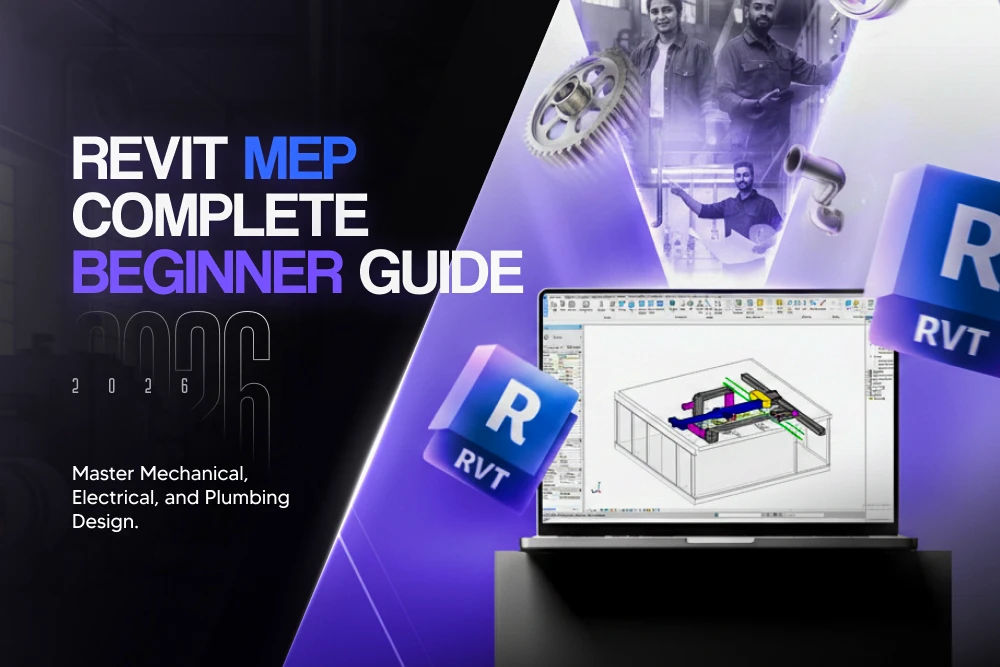


Revit MEP Coordination Beginners 2026: Step-by-Step Guide
Introduction: Why MEP Coordination Matters in Modern Construction
MEP coordination—the seamless integration of Mechanical, Electrical, and Plumbing systems—is no longer optional in construction. With 68+ active Revit MEP job openings across India and professionals earning ₹15,000 to ₹80,000 monthly, mastering Revit MEP coordination has become essential for engineers and architects entering the BIM (Building Information Modeling) field. In 2026, the construction industry demands professionals who can coordinate complex systems efficiently, detect clashes before they become costly on-site conflicts, and reduce design time by 30-40% compared to traditional CAD methods. This beginner's guide walks you through everything you need to know about Revit MEP coordination, from foundational concepts to actionable workflows you can implement today.
What is MEP Coordination in Revit?
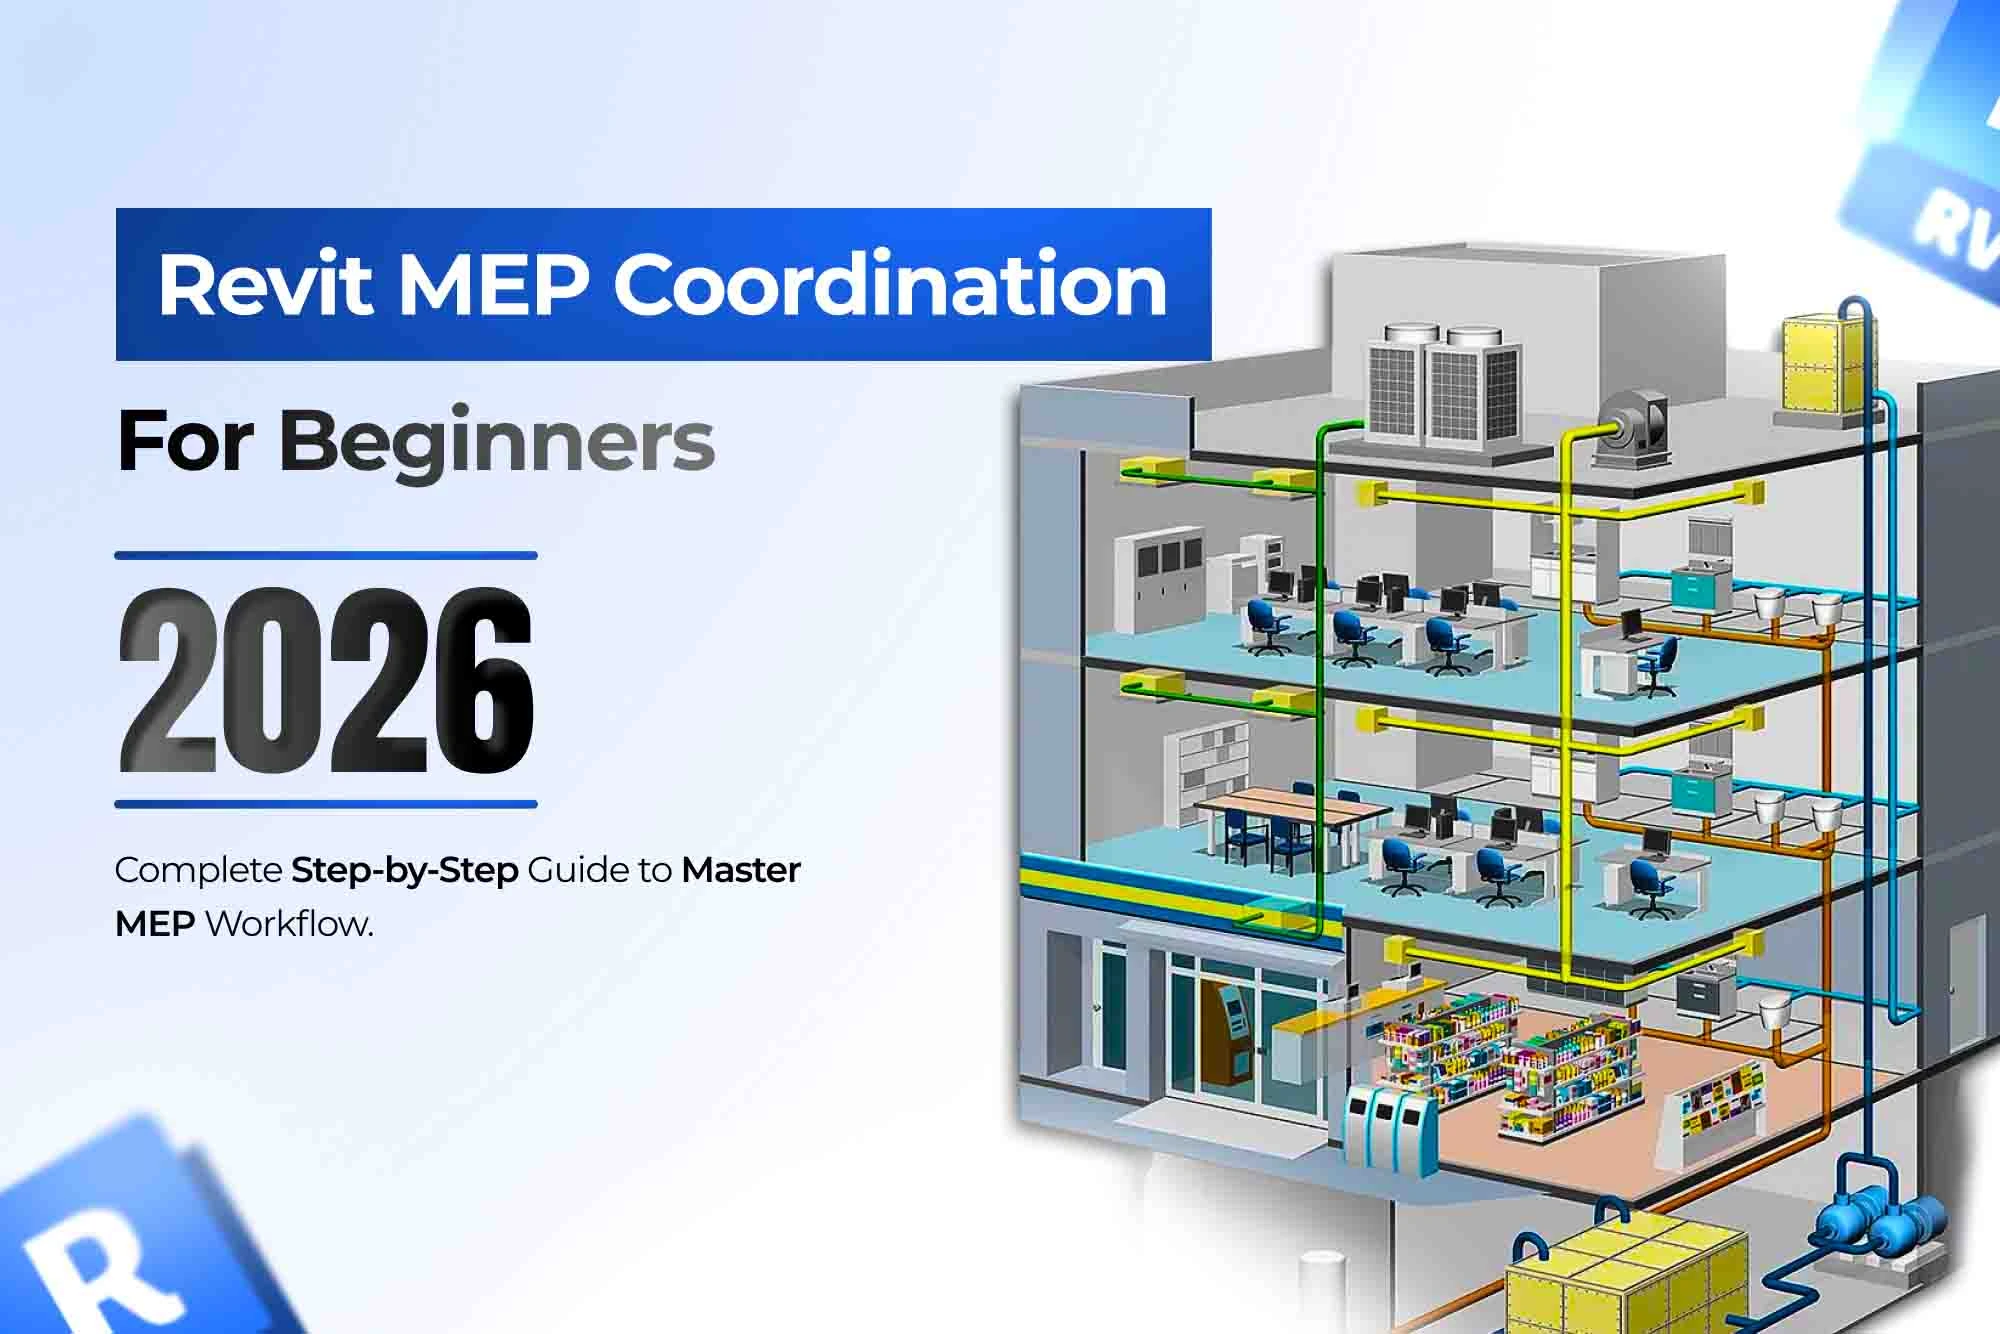
MEP coordination is the systematic process of aligning Mechanical (HVAC), Electrical (power, lighting, fire safety), and Plumbing (water supply, drainage, sanitary systems) within a unified Revit environment. Rather than working in siloed CAD drawings, teams now use Revit to coordinate all three disciplines simultaneously, ensuring that ductwork doesn't clash with electrical conduits, that plumbing pipes fit properly within wall cavities, and that all systems integrate logically within the building envelope.
Core Benefits of Revit MEP Coordination:
- Automatic clash detection identifies conflicts between systems before construction
- Coordinated 2D documentation (plans, sections, details) generated from a single model
- Real-time visibility when architects modify spaces (linked models notify MEP teams of changes)
- Accurate quantity takeoffs and panel schedules for procurement
- Reduced rework on-site, saving 20-30% of project time
When architectural teams link their designs into Revit, MEP engineers work in parallel with them, constantly checking for interferences. This collaborative workflow separates modern BIM practices from traditional 2D drafting.
The Three Core MEP Systems Explained
Understanding each system individually is the foundation of successful coordination:
1. Mechanical (HVAC) Systems
HVAC designs include supply air ducts, return air ducts, exhaust systems, and terminal units. The mechanical engineer must calculate heating and cooling loads, route ductwork through the building efficiently, and ensure ductwork doesn't interfere with the structure, electrical conduits, or plumbing. In Revit MEP, mechanical systems are color-coded (often blue for supply, red for return) for visual clarity.
Key Mechanical Components in Revit:
- Duct sizing and routing (rectangular or round)
- Air terminals (diffusers, grilles)
- Equipment (AHUs, heat recovery units, fans)
- Duct fittings (elbows, tees, transitions)
- Spiral ducts and flexible connections
2. Electrical Systems
Electrical coordination includes power distribution (panels, circuits, transformers), lighting design (fixtures, controls, dimming circuits), and safety systems (emergency lighting, exit signs, fire alarm conduits). The electrical engineer works with load calculations, voltage drop analysis, and circuit breaker coordination to ensure safe, efficient power delivery.
Key Electrical Components in Revit:
- Electrical panels and distribution boards
- Lighting fixtures and switching circuits
- Receptacles (power outlets) grouped into circuits
- Cable trays and conduit routing
- Transformers and switchgear
- Fire alarm and emergency communication systems
3. Plumbing Systems
Plumbing encompasses water supply (hot and cold), sanitary drainage (soil and waste lines), vent stacks, and specialized systems like medical gas or fire suppression. Plumbing engineers must maintain proper slope for drainage, prevent backflow, and route pipes to avoid structural members and other MEP systems.
Key Plumbing Components in Revit:
- Water supply pipes (hot, cold, circulation)
- Drainage and sanitary pipes
- Vent stacks and roof penetrations
- Plumbing fixtures (fixtures, traps, cleanouts)
- Pipe fittings and risers
- Slope management for drainage
Why MEP Coordination Fails and How Revit Prevents It
Traditional CAD Problems
In traditional 2D drafting, teams worked independently, creating separate electrical, plumbing, and HVAC drawings without immediate visibility of conflicts. A mechanical engineer might route ductwork through a space occupied by an electrical conduit, only discovered during construction, resulting in costly delays and rework.
Revit's Coordination Solution
Revit MEP addresses this through:
Clash Detection: Automatically identifies when systems occupy the same space. For example, if a 12-inch duct route intersects with an electrical conduit, Revit flags the clash in Navisworks or within the model itself.
Real-Time Model Linking: When the architect changes a wall location, the linked model updates in real-time. MEP teams see the change immediately and adjust their routing.
Unified 3D Model: All three disciplines exist in one 3D space. Engineers visualize how systems interact rather than inferring from separate 2D sheets.
Documentation Automation: Schedules, panel layouts, and detail sheets are generated directly from the coordinated model, reducing manual drafting and human error.
Step-by-Step MEP Coordination Workflow in Revit
Phase 1: Project Setup and Linking
Step 1: Select the Correct MEP Template
Begin every Revit MEP project with the appropriate template:
- Mechanical Template: For HVAC-focused projects
- Electrical Template: For power and lighting design
- Plumbing Template: For water and sanitary systems
- MEP Coordination Template: For multi-discipline coordination (recommended for beginners)
The coordination template includes pre-configured view types, schedules, and annotation standards aligned with industry best practices.
Step 2: Link the Architectural Model
Navigate to Collaborate Tab > Manage Links > Link Revit and select the architect's Revit file. Position the linked model at coordinates (0, 0, 0) to ensure alignment. Set link positioning to "Last Saved Location" for consistency across team members.
Step 3: Copy Levels and Grids from the Linked Model
Use Collaborate Tab > Copy/Monitor to synchronize levels and grids from the architectural model into your MEP project:
- Select all levels (Level 1, Level 2, etc.)
- Select all column grids
- Click "Place" to copy them into your MEP file
- Enable Monitor to track future changes—if the architect raises Level 2 by 6 inches, Revit alerts you to update your MEP design
Step 4: Configure View Range and Visibility
For floor plans, set View Range to show a 14-foot vertical slice (typical commercial floor-to-floor height). In Visibility/Graphics Overrides, toggle each MEP discipline on or off. Create separate views for each discipline (mechanical plan, electrical plan, plumbing plan) to avoid visual clutter.
Phase 2: Mechanical System Design and Routing
Step 5: Create HVAC Equipment and Ducts
Place mechanical equipment (AHUs, fans, heat recovery units) from Systems Tab > Mechanical Equipment. Design, supply, and return ductwork:
- Navigate to Systems Tab > Duct
- Route supply ducts (typically blue) from the AHU to supply air terminals throughout the building
- Route return ducts (typically red) back to the AHU
- Apply duct fittings (elbows, tees) as needed
- Add air terminals (diffusers, grilles) in occupied spaces
Step 6: Apply Duct Sizing and Pressure Drop Analysis
In Revit MEP, ducts are automatically sized based on design air volume and velocity calculations. Access duct properties to:
- Verify duct cross-sectional dimensions match design calculations
- Check velocity (typically 700-900 FPM in main ducts)
- Review system pressure drop to ensure fan equipment is sized appropriately
Phase 3: Electrical System Design
Step 7: Place Electrical Panels and Design Circuits
From the Systems Tab > Electrical Equipment, place electrical distribution panels. Create circuits by:
- Selecting lighting fixtures or receptacles
- Choosing Create System from the Modify Tab
- Assigning them to a circuit (Circuit 1, Circuit 2, etc.)
- Specifying wire gauge and conduit routing
Step 8: Add Lighting and Power Outlets
Place lighting fixtures from the Systems Tab > Lighting Fixture. For each fixture:
- Assign it to a lighting circuit
- Verify load calculations (watts per circuit)
- Route conduit from fixture to panel, avoiding MEP conflicts
Place receptacles (outlets) from Systems Tab > Receptacle and group them into circuits based on load and location.
Step 9: Generate Panel Schedules
Navigate to Analyze Tab > Panel Schedule to automatically generate circuit lists showing:
- Circuit number and breaker size
- Connected fixtures and load (watts)
- Voltage and phase information
- Total panel load
This schedule is tied to the model—if you add a fixture, the schedule updates automatically.
Phase 4: Plumbing System Design
Step 10: Create Water Supply and Drainage Systems
From Systems Tab > Pipe, draw:
- Hot water supply (typically red) from the water heater to fixtures
- Cold water supply (typically blue) from the main to fixtures
- Sanitary drainage (typically dark gray) from fixtures downward to the sanitary main
- Vent stacks (typically light gray) rising above the roof
Step 11: Add Plumbing Fixtures and Slope
Place fixtures from Systems Tab > Plumbing Fixture (sinks, toilets, showers, etc.). For each drainage pipe:
- Select the pipe
- In Properties, set Slope to 1/4 inch per foot (standard for sanitary drainage)
- Verify no water pooling occurs in horizontal runs
Step 12: Create Piping Systems
Group pipes into named systems:
- Select multiple pipes
- Navigate to Modify Tab > Create System
- Name the system (e.g., "Hot Water Supply - Floor 2")
This helps identify and isolate systems when troubleshooting.
Phase 5: Coordination and Clash Detection
Step 13: Run Clash Detection
Export your Revit MEP models to Navisworks or use Revit's built-in 3D view to visually inspect for clashes:
- In Navisworks, set each system to a distinct color (HVAC in blue, Electrical in yellow, Plumbing in red)
- Use Clash Detective to automatically identify overlapping systems
- Review each clash: some are acceptable (e.g., a small duct passing near a conduit with 2 inches of clearance), others require rerouting
Step 14: Resolve Clashes
Prioritize clashes by severity:
- Critical: Systems cannot pass through the same space (e.g., duct intersecting a structural beam) → reroute immediately
- Moderate: Systems are very close with minimal clearance → confirm clearance requirements with the design team
- Minor: Systems are near but not touching → document for reference
Reroute systems to avoid clashes, coordinating with the architectural and structural teams.
Phase 6: Documentation and Schedule Generation
Step 15: Create Professional Plan and Section Views
Generate clean, annotated plans showing:
- Equipment locations with labels and flow directions
- Ductwork, conduit, and piping routes with sizes
- Fixture schedules with quantities and specifications
- Legends showing system colors and symbols
Step 16: Generate Final Schedules
Revit automatically produces:
- Mechanical Equipment Schedule: Lists all AHUs, fans, etc.
- Electrical Panel Schedule: Circuit list with loads
- Lighting Fixture Schedule: Quantity and wattage by room
- Plumbing Fixture Schedule: Fixtures by building area
Export these schedules to Excel for procurement, engineering review, and contractor coordination.
Common MEP Coordination Challenges and Solutions
Challenge 1: Ductwork Clashing with Electrical Conduit
Solution: Prioritize routing—HVAC generally requires larger spaces, so design ductwork first, then route electrical conduit around it. Use 3D views constantly to catch conflicts early.
Challenge 2: Difficulty Maintaining Plumbing Slope
Solution: Enable Revit's slope display in views. Set drainage pipes to 1/4" per foot slope using the Properties panel. Use 3D section views to confirm pipes slope downward visually.
Challenge 3: Confusion About System Connectivity
Solution: Create separate 3D views for each discipline. Use color-coding rigorously (always hot water = red, cold = blue). Label all equipment and major branches.
Challenge 4: Model Becomes Too Heavy/Slow
Solution: Create discipline-specific views showing only relevant systems. Hide or delete reference elements you don't need. Regularly audit and clean up the model.
Challenge 5: Architectural Changes Break MEP Design
Solution: Use the Monitor function religiously. When the architect moves a wall, Revit alerts you. Review monitored changes regularly and update your MEP systems accordingly.
Career Opportunities in Revit MEP Coordination
The construction industry's shift to BIM has created significant demand for MEP professionals. With 68+ active Revit MEP positions in India alone, professionals with strong coordination skills command competitive salaries:
- MEP Coordinator (Entry-level): ₹15,000–₹25,000/month
- MEP Designer/BIM Modeler: ₹25,000–₹50,000/month
- BIM Manager/Lead Coordinator: ₹50,000–₹80,000/month
In-Demand Skills:
- Revit MEP (mechanical, electrical, plumbing modules)
- Clash detection (Navisworks, Solibri)
- BIM coordination and management
- Understanding of HVAC, electrical, and plumbing engineering principles
- Project coordination across multiple disciplines
Companies now prioritize hiring professionals who can demonstrate real-world coordination experience, accurate clash detection, and quality documentation.
Next Steps: From Beginner to Professional MEP Coordinator
Mastering Revit MEP coordination requires more than learning software commands—it demands understanding engineering principles, developing spatial reasoning, and building coordination discipline.
Your Path Forward:
- Master the Basics: Complete a structured course covering all three MEP disciplines
- Practice with Real Projects: Apply skills to residential and commercial projects
- Understand Engineering: Learn HVAC load calculations, electrical circuiting, plumbing slope requirements
- Develop Coordination Skills: Practice clash detection and model organization
- Build Your Portfolio: Document your best projects to showcase to employers
Ready to Master Revit MEP Coordination?
Professional MEP coordination skills open doors to high-paying careers in India's growing construction and BIM sectors. S2B School of Engineering offers hands-on, project-based Revit MEP training with certified instructors, real-world projects, ISO-recognized certification, and placement support.
Learn MEP coordination from industry experts. Enroll in our comprehensive Revit MEP training program today and position yourself for success in BIM careers earning ₹15,000 to ₹80,000 monthly.
[Enroll in S2B's Revit MEP Coordination Course] → Master HVAC, Electrical & Plumbing Coordination
Frequently Asked Questions
What's the difference between Revit MEP and Revit Architecture?
Revit Architecture focuses on building design, including walls, doors, windows, and structural elements. Revit MEP is specialized for mechanical systems (HVAC), electrical systems (power, lighting), and plumbing (water, drainage). They're often used together: architects design the building, MEP teams design the systems using linked models.
Do I need engineering knowledge to learn Revit MEP?
A basic understanding of HVAC, electrical, and plumbing principles helps significantly. You should understand concepts like air flow, electrical load calculations, and drainage slope. S2B's course covers both the software and these engineering fundamentals.
How long does it take to become proficient in Revit MEP coordination?
Most professionals achieve basic proficiency (designing simple systems, running clash detection) in 3-4 months with consistent practice. Advanced coordination skills develop over 1-2 years of real project experience.
What's the job market like for Revit MEP professionals in India?
Strong demand. With 68+ active openings across India and growing BIM adoption in construction, skilled MEP coordinators are highly sought. Salaries range from ₹15,000 to ₹80,000 monthly, depending on experience.
Can I learn Revit MEP without formal training?
You can learn basics from YouTube and tutorials, but structured training significantly accelerates learning and ensures you develop professional-grade coordination skills. Project-based courses with real-world projects are most effective.